
Introduction
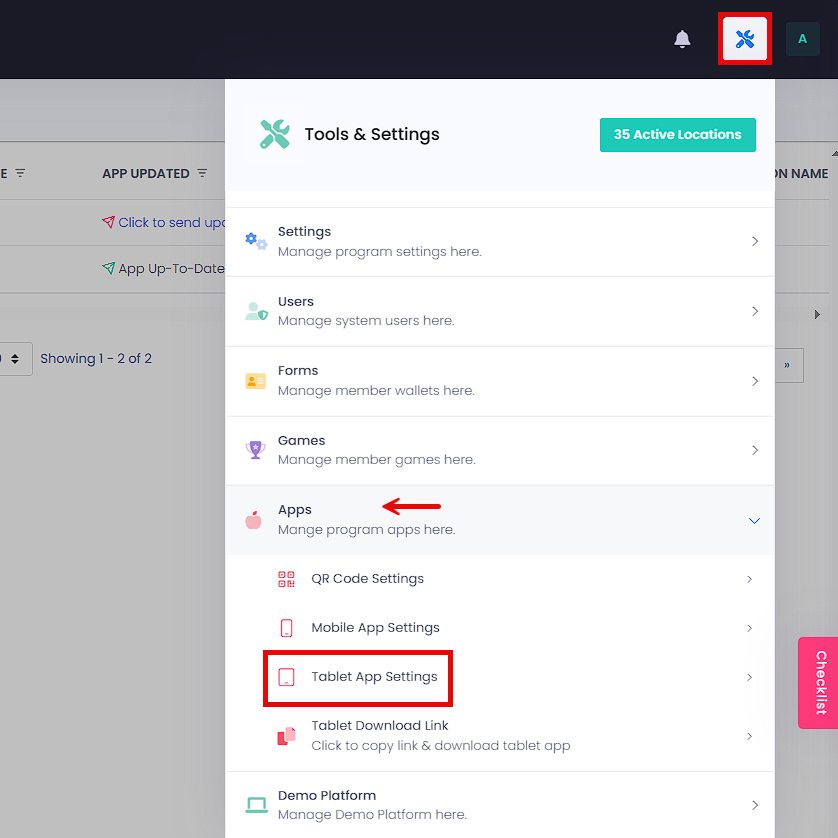
To manage the Tablet settings, go to Tools and Settings icon > Apps tab > Tablet App Settings subtab.
Manage Tablet Settings
Basic Setup
You can manage the Tablet application's basic functions and control how members interact with it through Tablet Settings.
For a Check-In Visit program, make sure to review the Check-In Settings on the left. In this example, the tablet is configured to record check-ins, locked to prevent access to other apps, and displayed in Landscape mode.
By default, locked or expired offers are hidden after check-in, but you can enable these options to display them. Confirmation Required verifies whether a member's email or SMS is confirmed and allows unconfirmed members to update their preferences.
The Display TOL option is also available when TOL Settings is enabled for your program.
If you use Gamification or Instant Win, enable the setting by selecting it from the dropdown
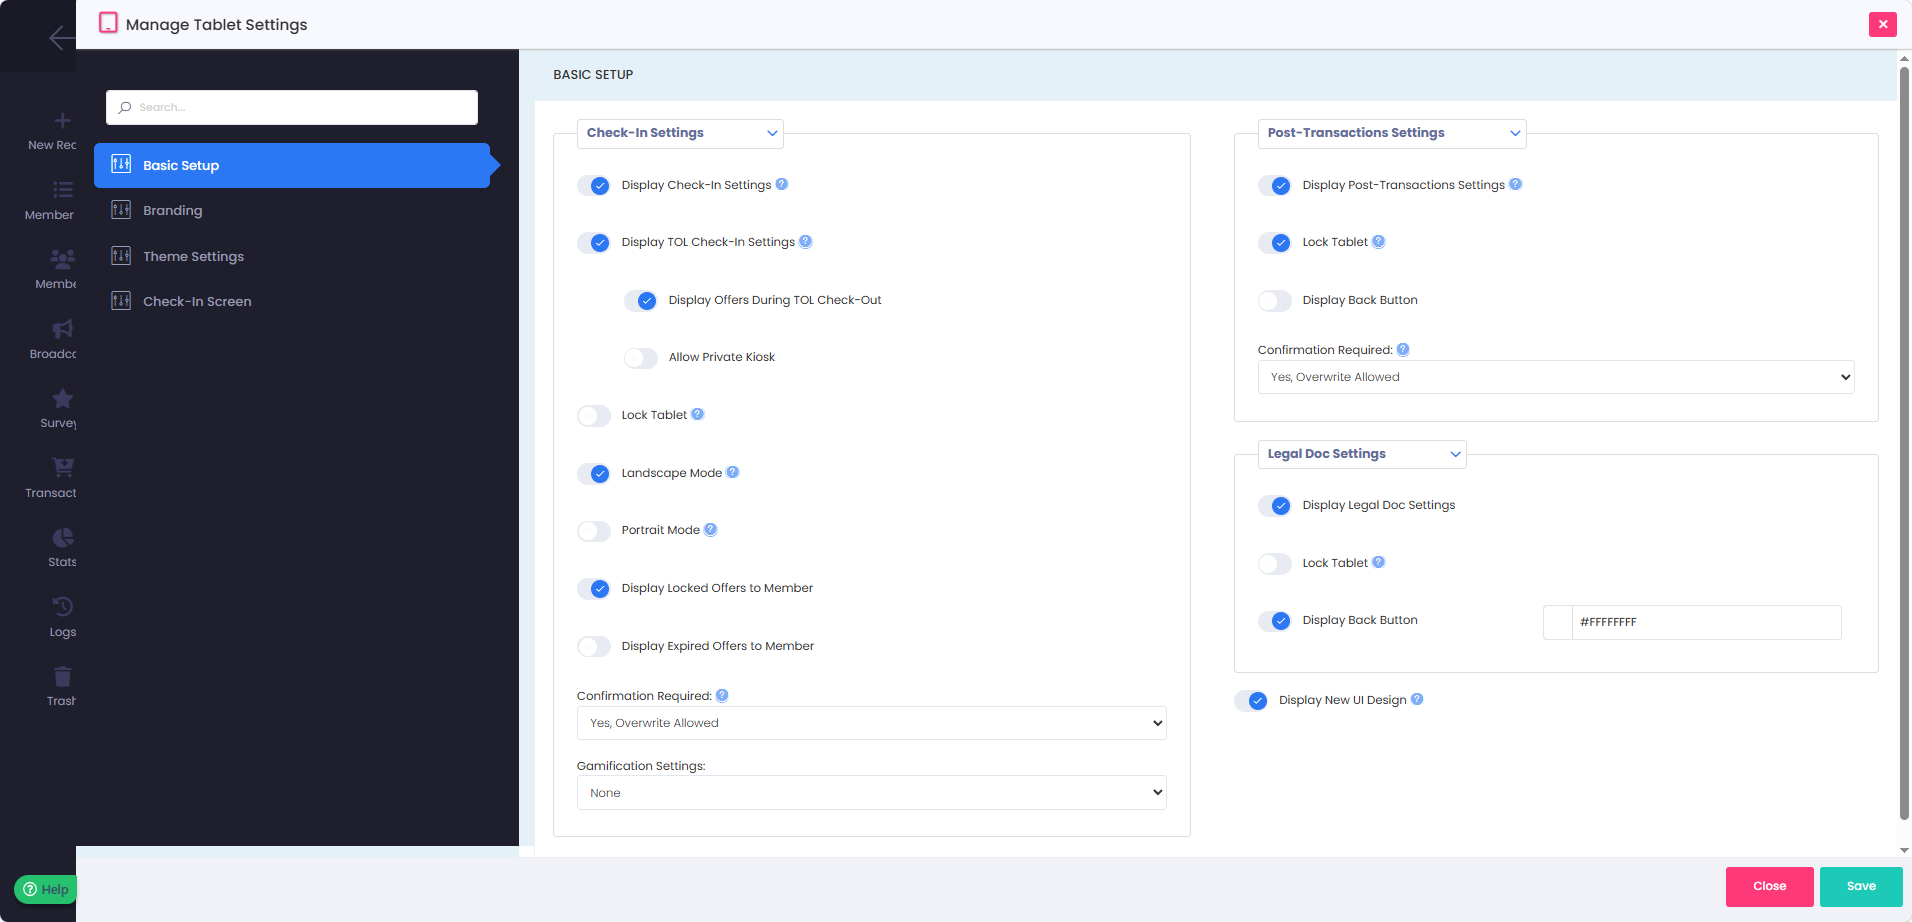
NOTE:
- Screen Display - If Yes, you have to set up a related screen otherwise leave as it is.
- Locked Tablet - If the tablet is locked (YES) the Tablet removes navigation options and is unable to reach the home screen without first entering a username and password to unlock the Tablet. We highly recommend keeping this feature turned on (YES) to prevent members from surfing the Tablet.
- Landscape Mode - Choose this setting if using the tablet in Landscape mode.
- Portrait Mode - Choose this setting if using the tablet in Portrait mode.
- Confirmation Required - If “Yes” is selected, an Email or Mobile must be confirmed to participate. A popup message will display a resend confirmation button to confirm email or mobile number. If “Yes, Overwrite Allowed” is selected the Members or staff has ability to resend confirmation but post the transaction without member being confirmed. If “No” is selected, confirmation is not required.
When running a Spending Program, the Post-Transaction Settings must be configured. In addition to Lock Tablet and Confirmation Required, you can enable Display Back Button to allow staff to log out of one location and switch to another when posting transactions. In most cases, this setting should remain Off to keep transaction posting locked to a single location.
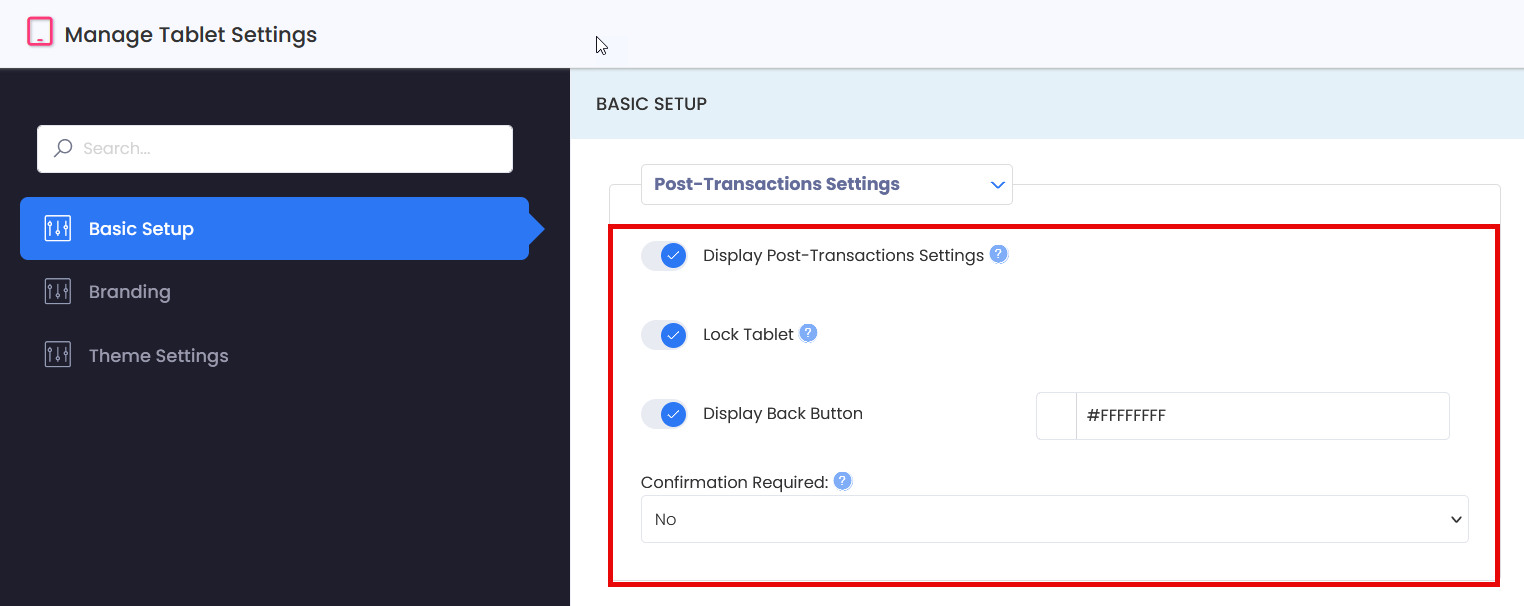
- Display Post-Transaction Settings – If running a spending program, this setting must be enabled.
Branding
The Branding and Theme Settings should already be configured but you may modify them by clicking either tab.
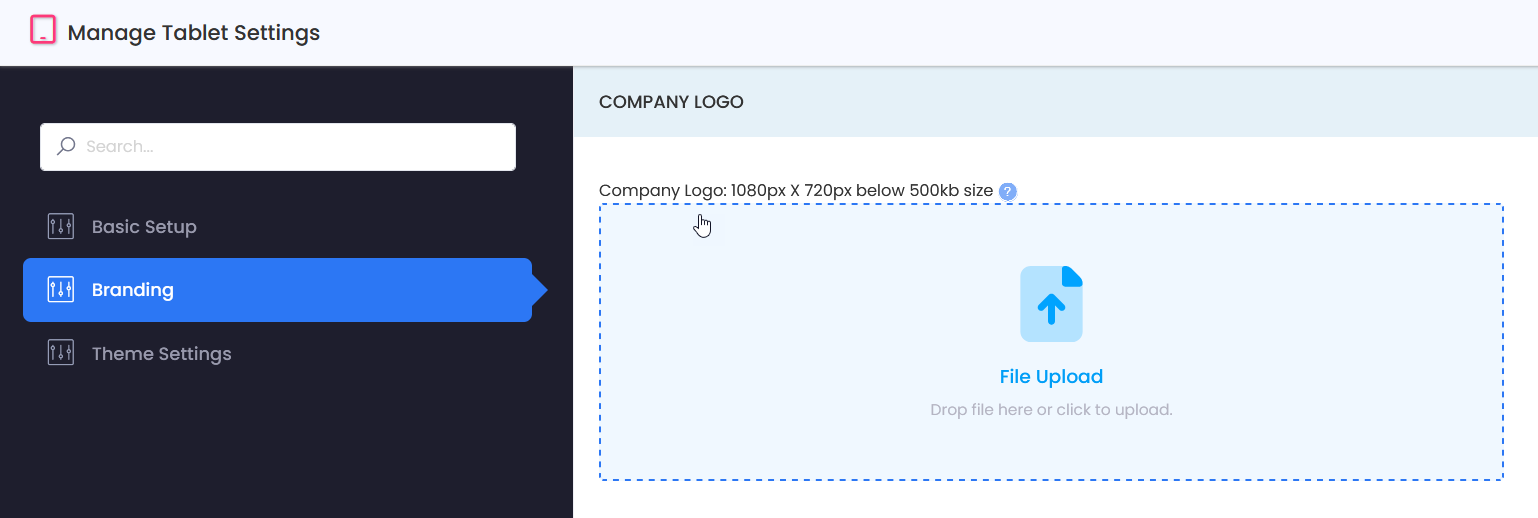
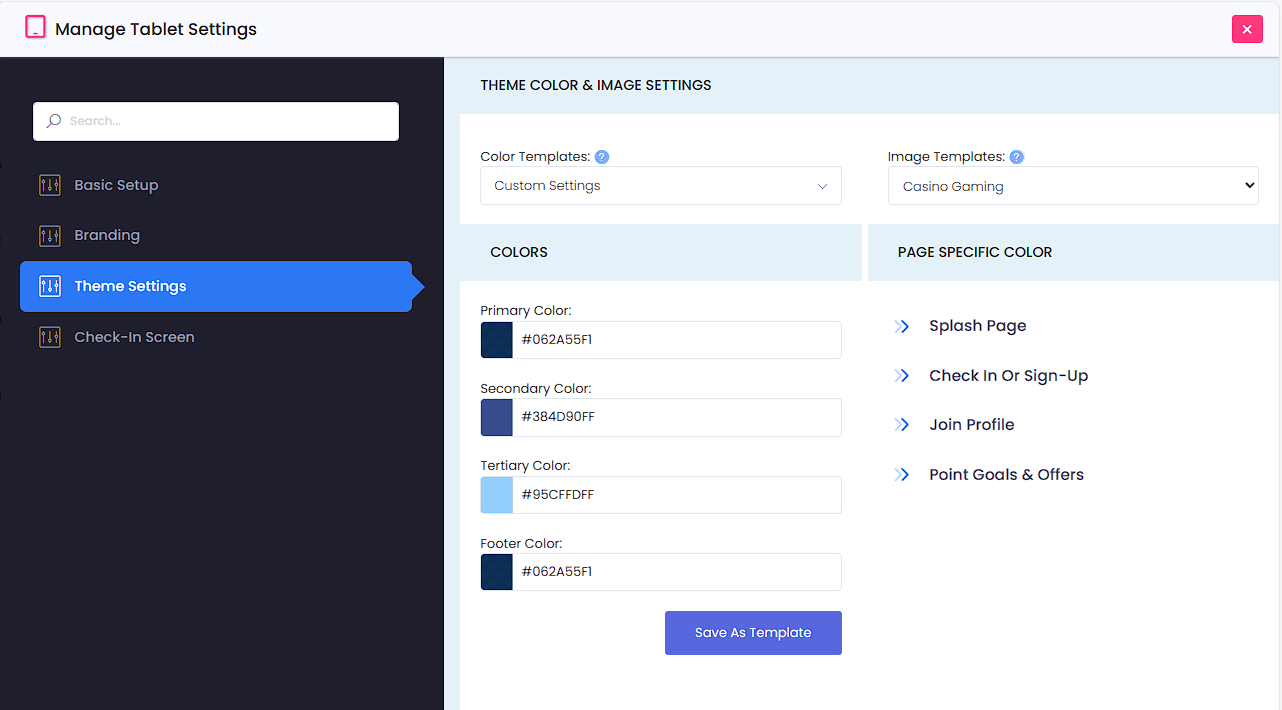
- Logo Image - The optimum image size is displayed, but any size will work and format accordingly.
- Select Template - Select a pre-created template as a starting point. All Theme Color & Style Settings can be overwritten.
- Select Profile Template - Select a pre-created template as a starting Point. All images can be overwritten.
Check-In Screen
Splash Page
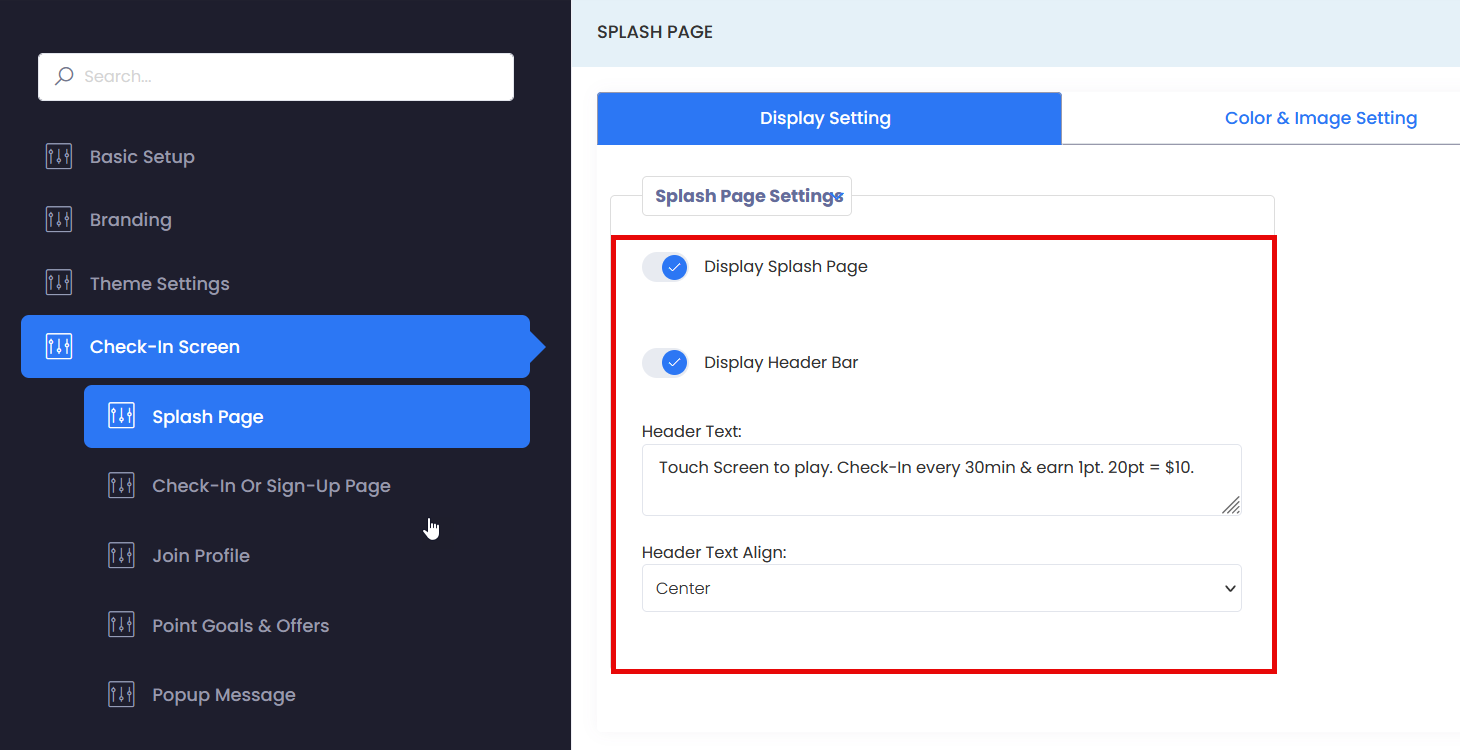
When using a Check-In Visit program, the next step to configure is the Check-In Screen. This section shows the entire user experience that the customer has with the tablet after they have entered their phone number. One of the first options is to display a splash page. This page can advertise the business or program before the member is allowed to check-in. You can choose to display header text or turn the toggle Off.
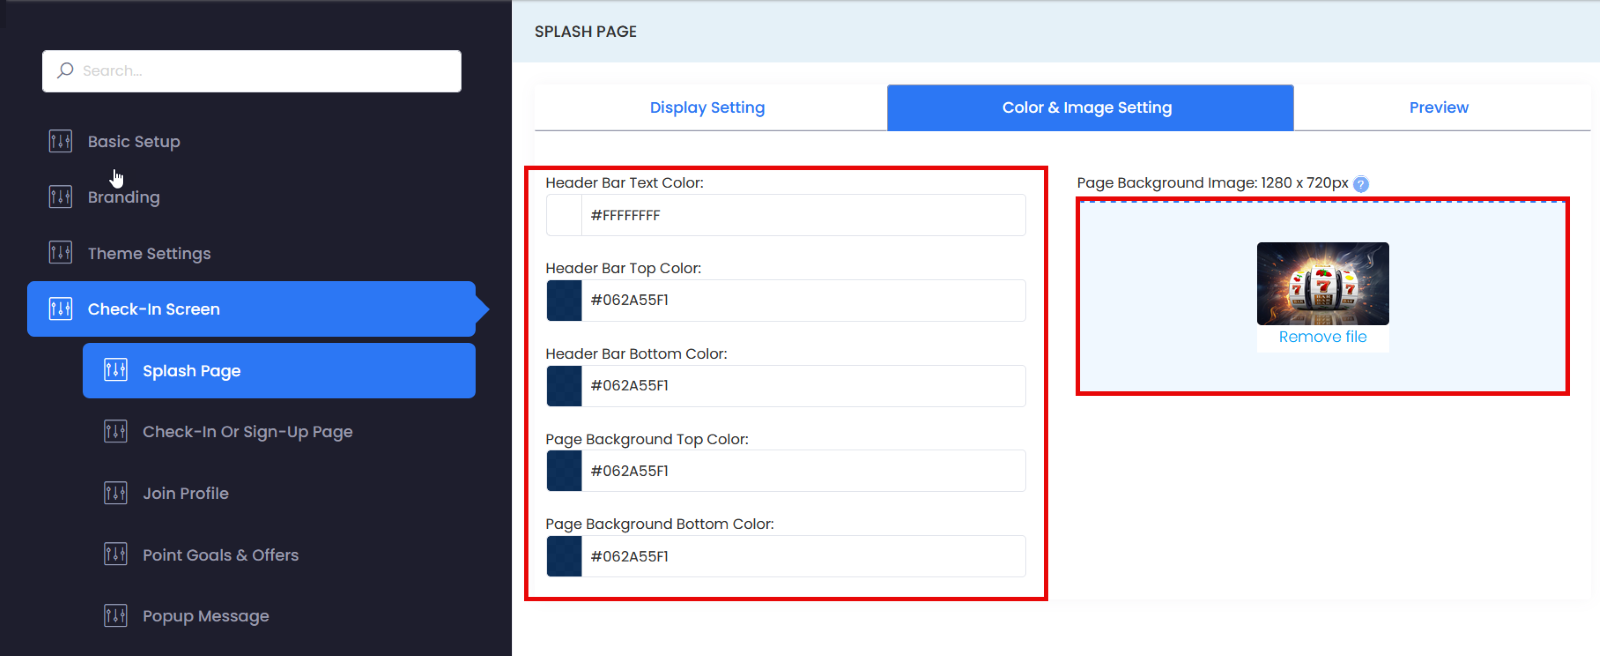
You can also change the splash image and page colors.
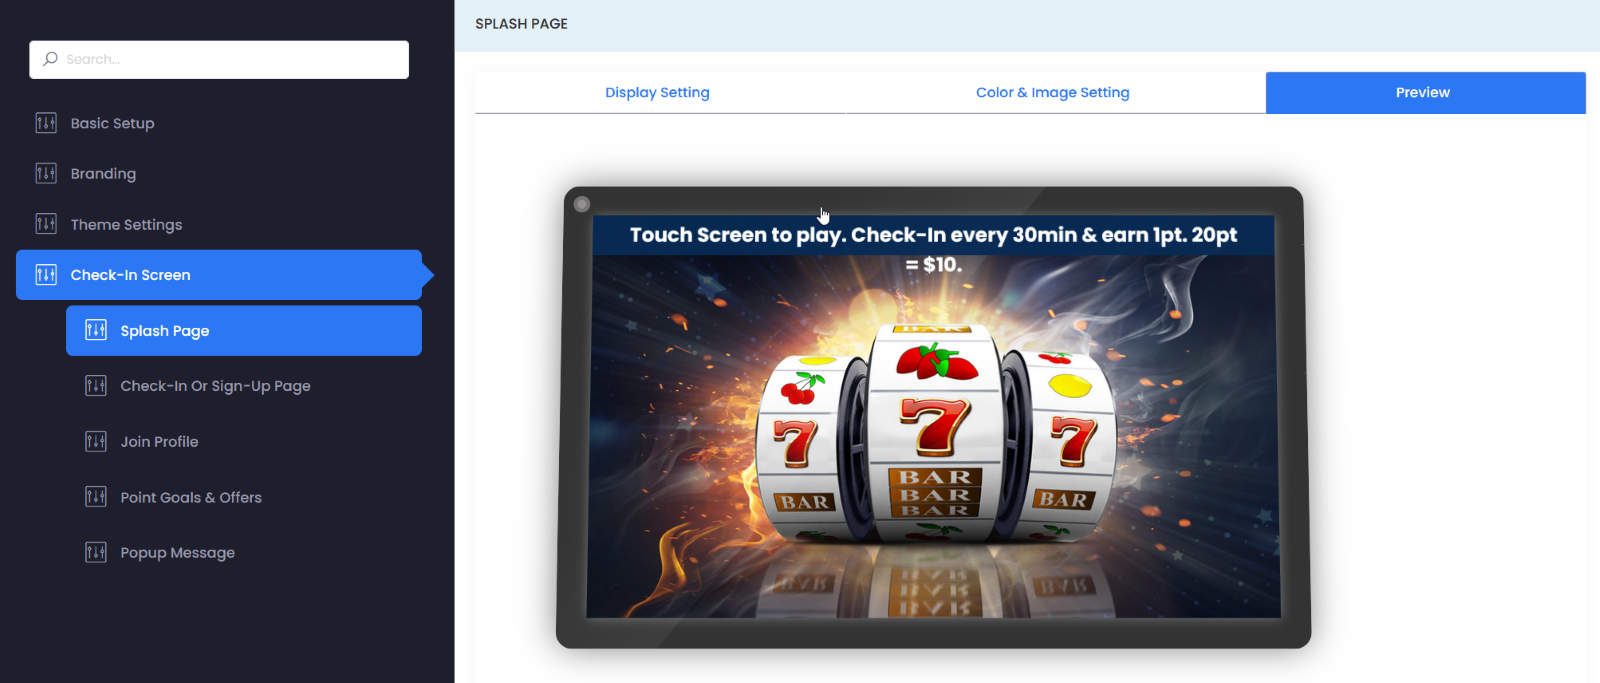
When finished, make certain to preview the page.
Check-In or Sign-Up Page
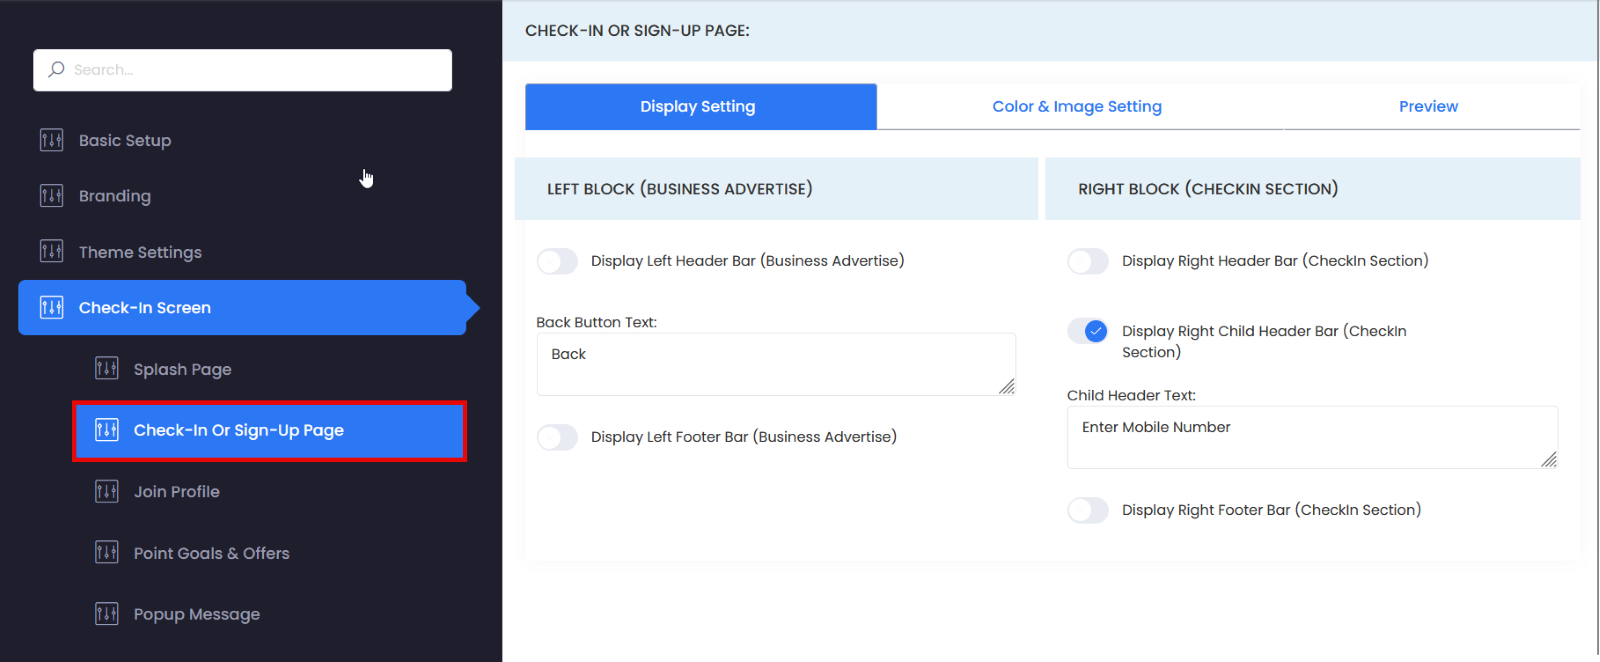
The next subtab is the Check-In or Sign-Up Page. In the Display Settings, you can turn On and Off the Left and Right Blocks and configure your message.
Join Profile
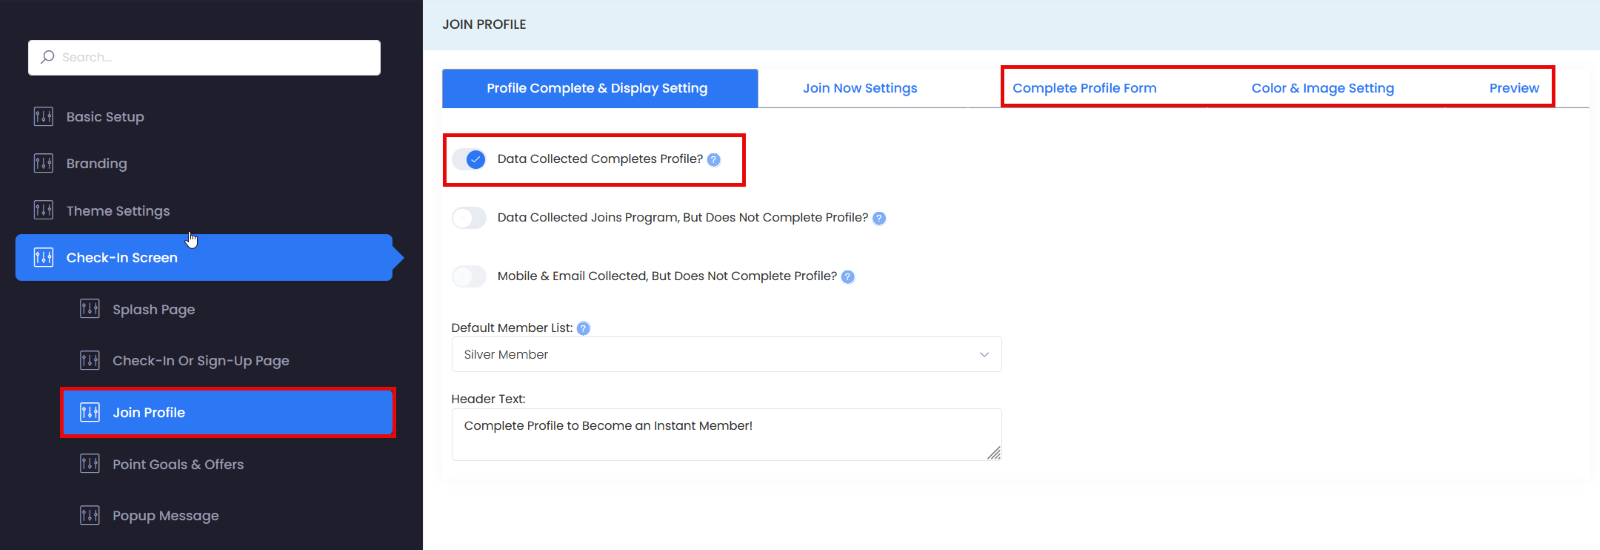
Next is the Join Profile subtab. By default, the complete profile settings are turned Off. We do not require customers to complete their profiles on the tablet at the point of entry, but you can require this if you choose to. By turning this On, you'll see these additional features.
NOTE:
- Data Collected Completes Profile - Toggle this option if the data collected on the Complete Profile Form tab constitutes a completed profile. If considered complete. Member bonus points will be issued if set-up in the program settings.
- Data Collected Joins Program - Toggle this option if the data collected Joins the program. To receive completed profile bonus points, the member must complete their profile in their online member account or the mobile app.
- Mobile & Email Collected - Toggle this option if the member’s mobile and email Join the program. To receive completed profile bonus
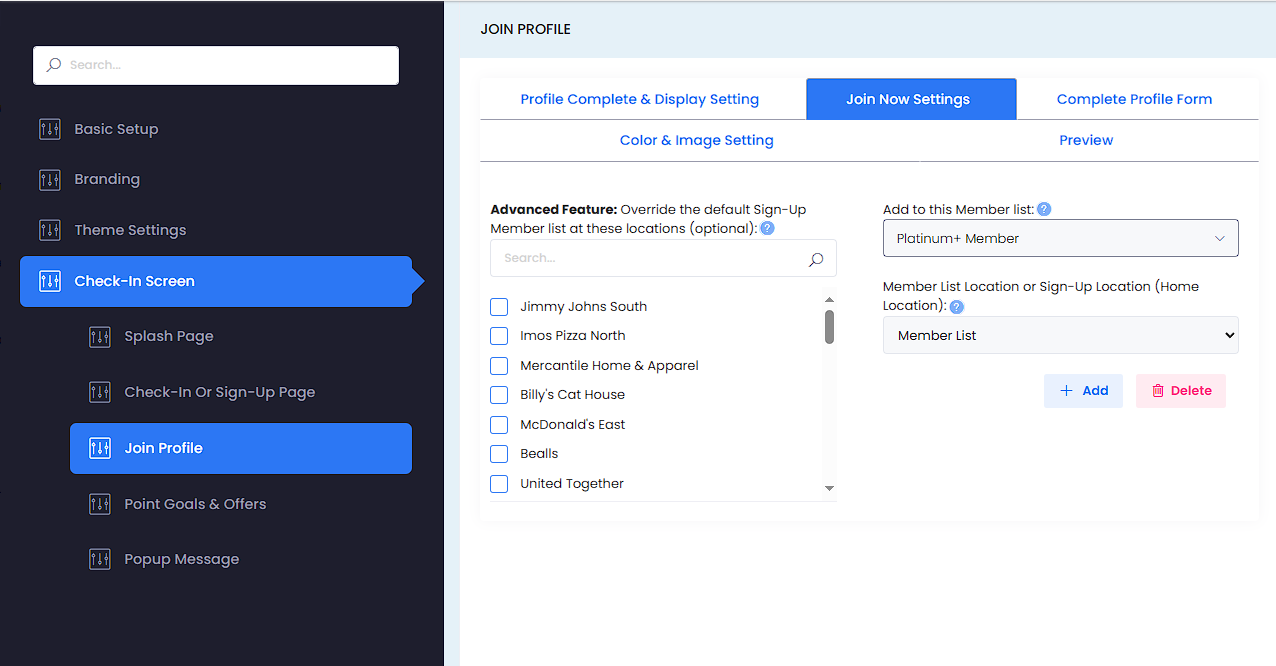
Under the Join Now Settings subtab, we will determine where we put this customer when they join choose the sign-up location they are affiliated with.
NOTE:
- Override Default List - To override the default list chosen in the previous step for a given location, choose the location below and select the member list on the right.
- Select Member List - Choose the member list you’d like to add a member to who joins at the locations selected on the left.
- Choose Home Location - Choose to tag the member’s Home location with the default member list location or use the Sign-Up location.
On the Complete Profile Form subtab, choose the data you’d like to collect and determine if the field is Required on Sign-Up or can be collected after Sign-Up. If required after Sign-Up, the member can join the program but does not receive bonus points for joining until they complete the fields in their online account or in the business mobile app.

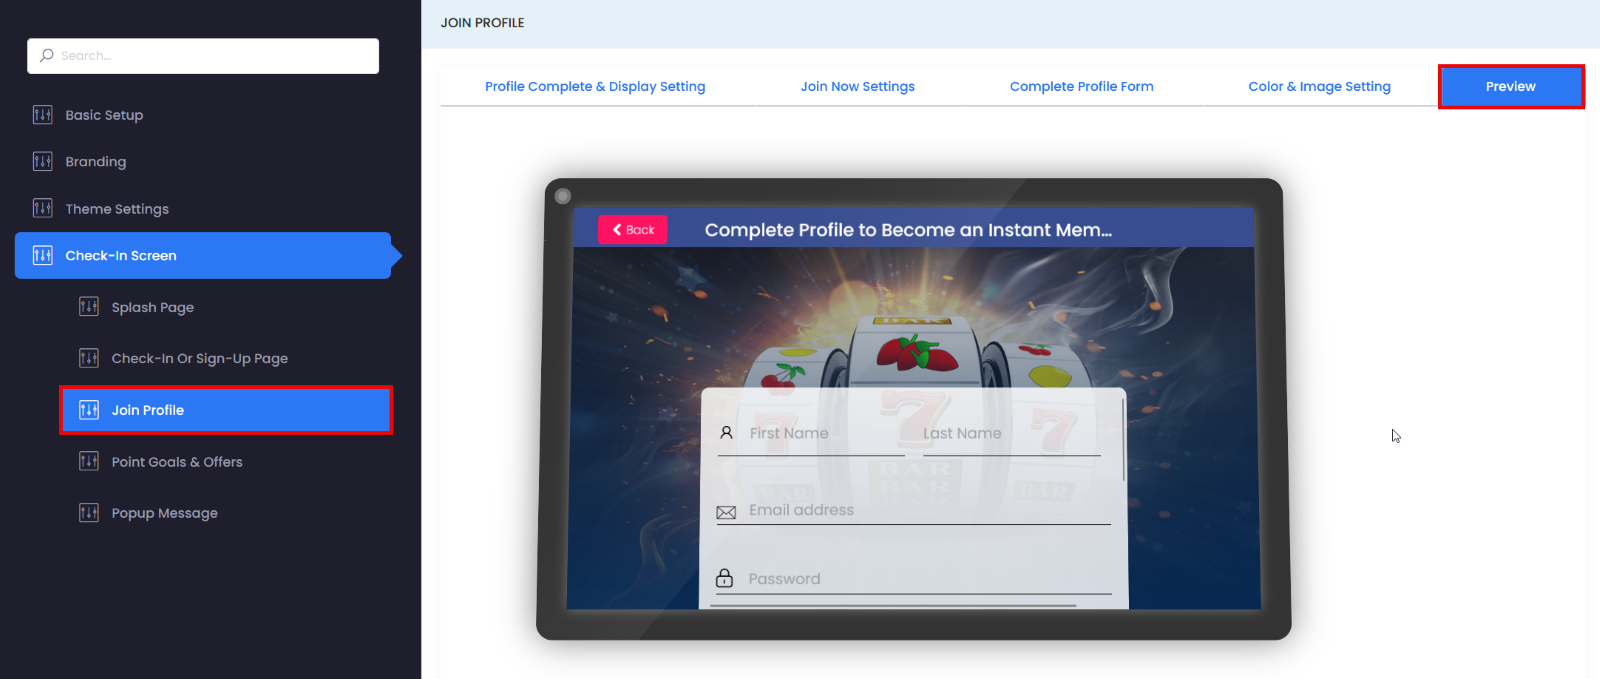
The Color & Image Settings subtab controls the color settings on the Join Now page. Under Preview subtab, you can view the Join Now page the member accesses after entering their phone number.
Point Goal & Offers
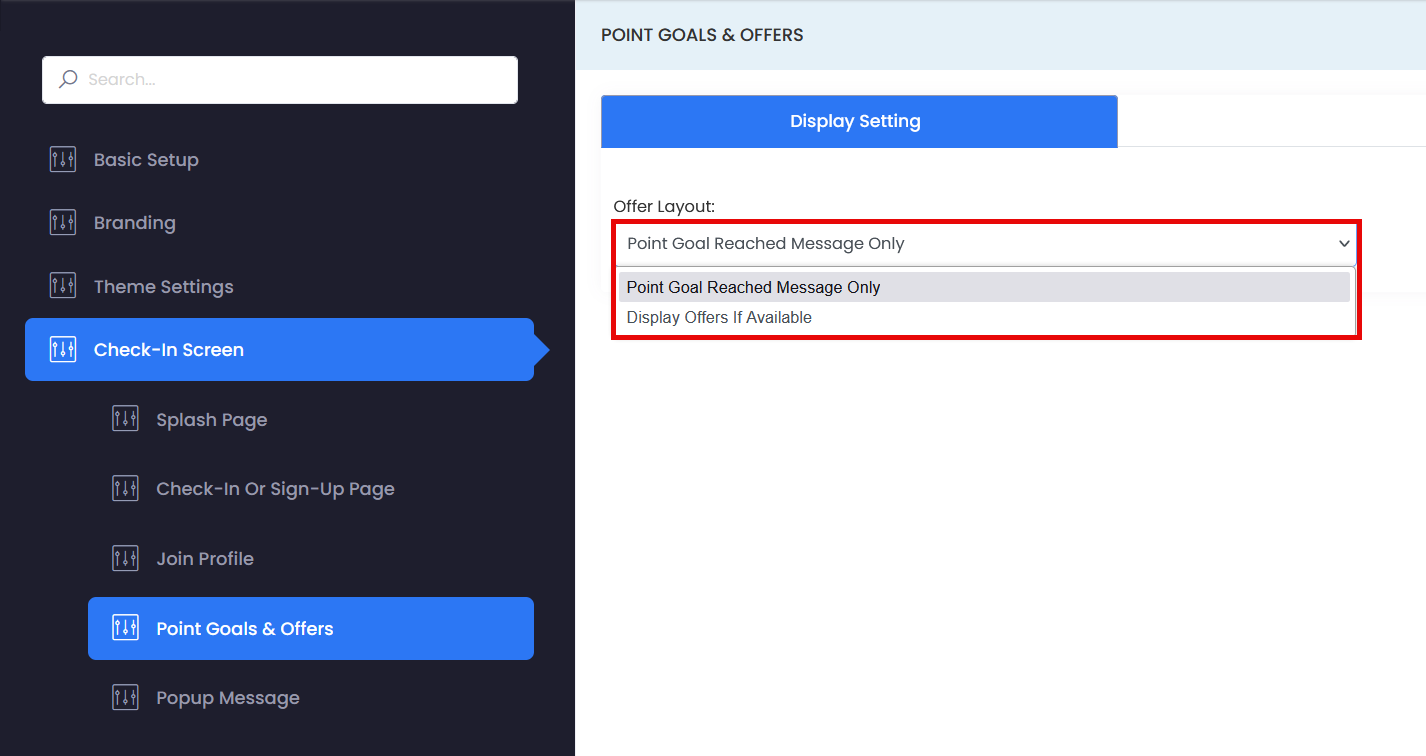
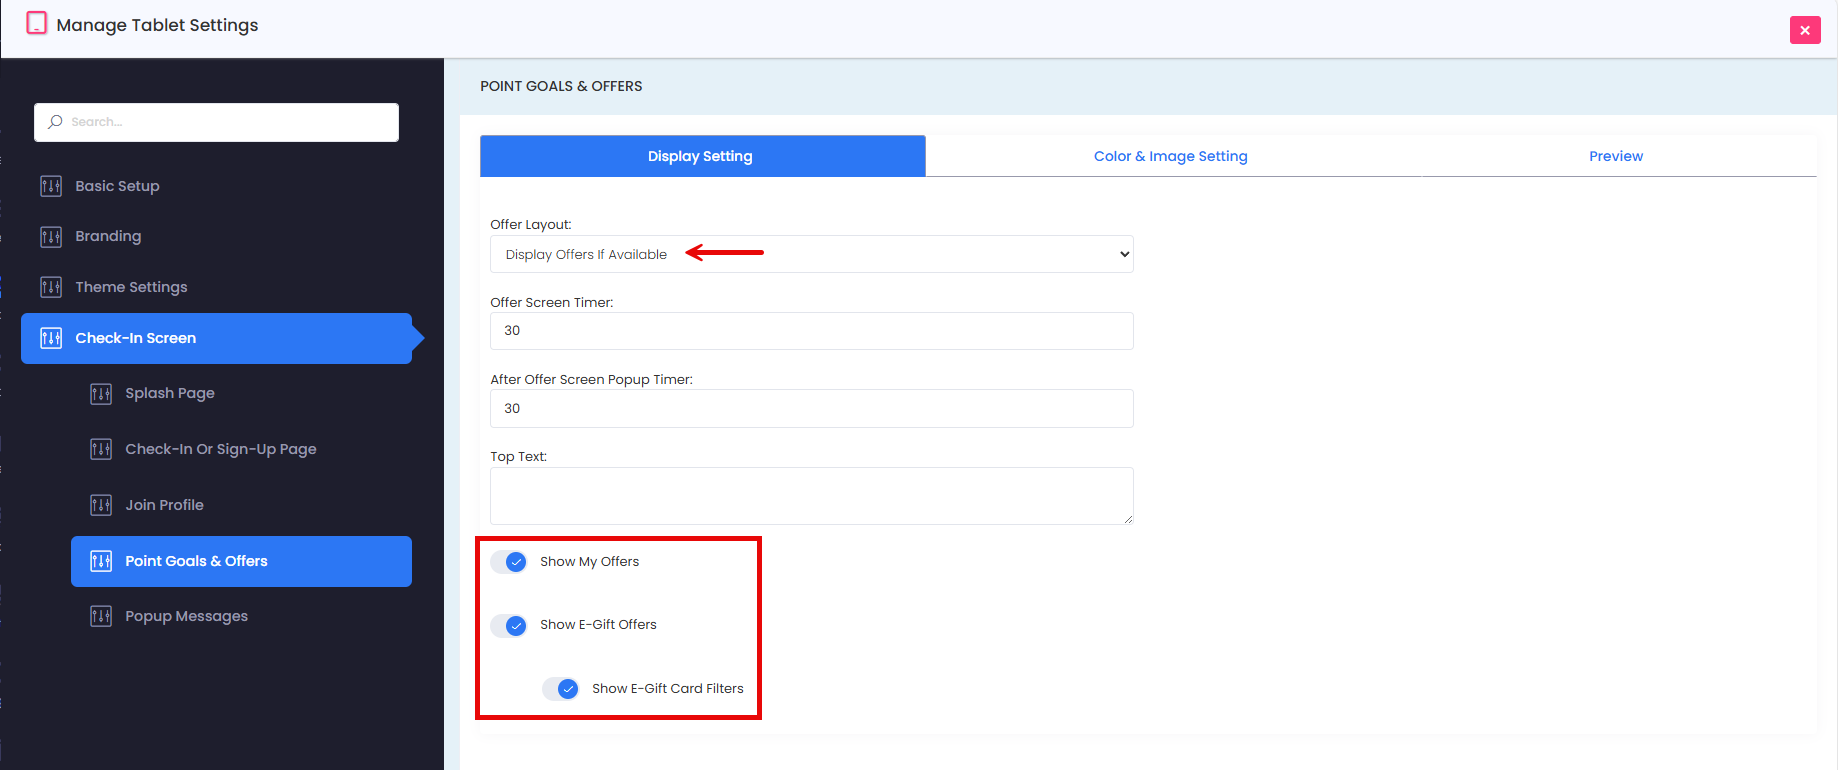
Once the design is finished, advance to the Point Goals & Offers subtab. Under the Display Settings subtab, choose to display offers if available. If selected, whenever offers are available, and permission is granted when creating the offer, the offer will be displayed to the member if available in their account. If the option to display a Point Goal Reached message, offers will not display Offer screen timer; when it times out, it will go back to the standard opt-in page.
Popup Message
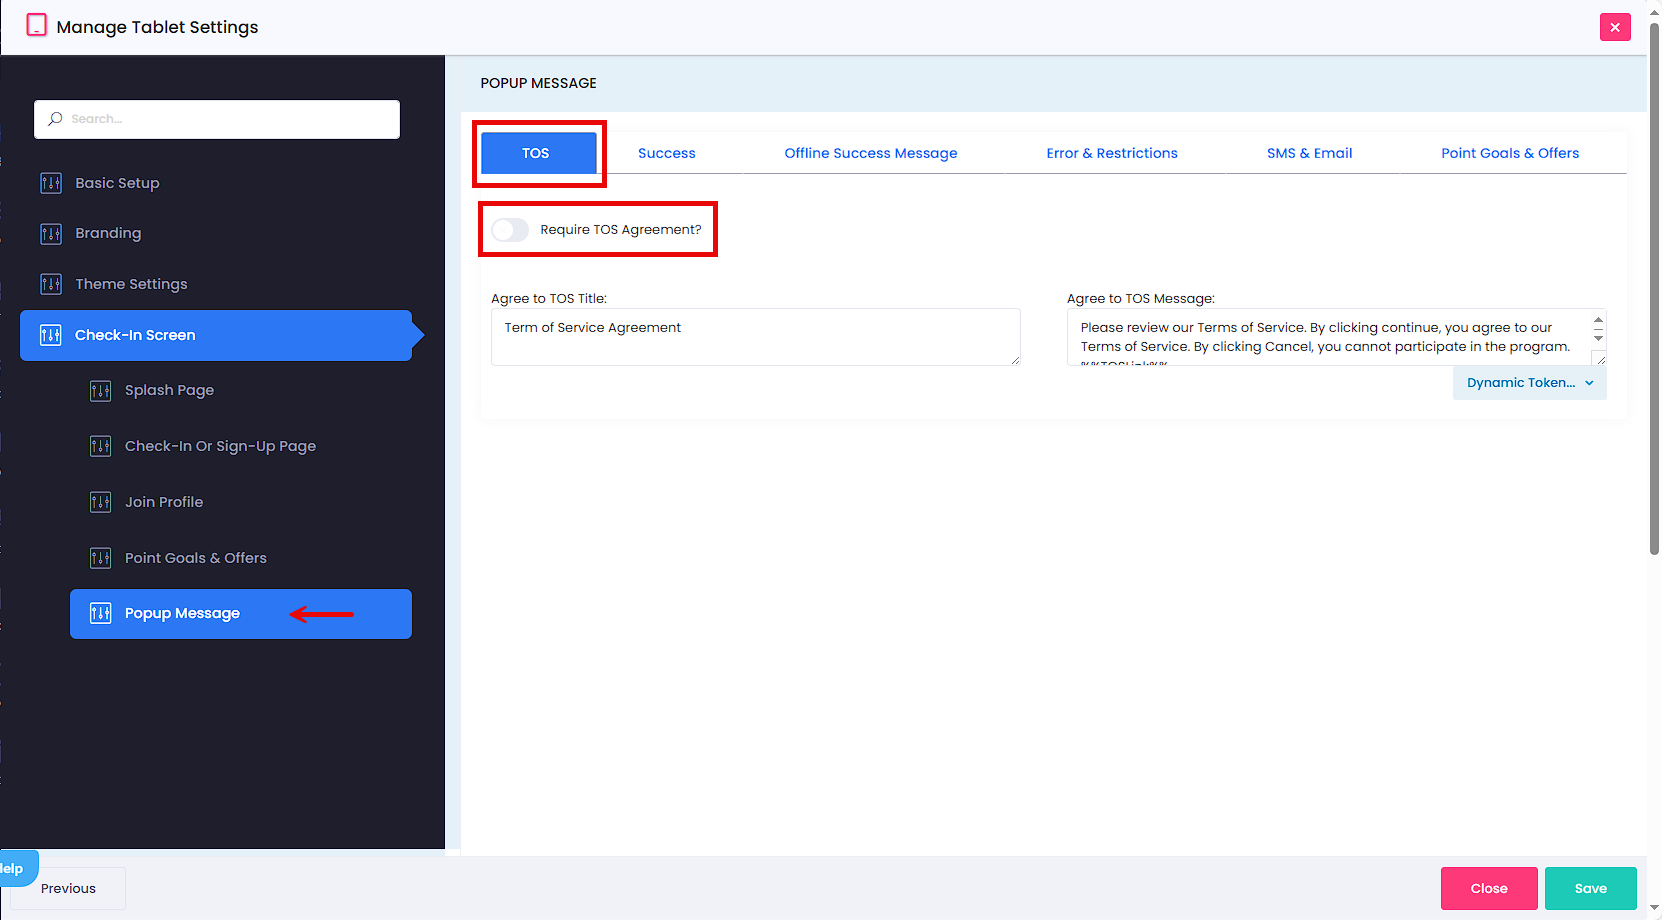
The last step, found under the Pop-Up Message subtab, is approving the text displayed to the member. The first subtab in this section is titled TOS. Choose to require your Terms of Service to be required to participate and agreed to when joining the program. You can also customize the message text.
You can find a subtab titled Success. Under this subtab, you can select the messages you want to include for a successful check-in and customize the check-in options.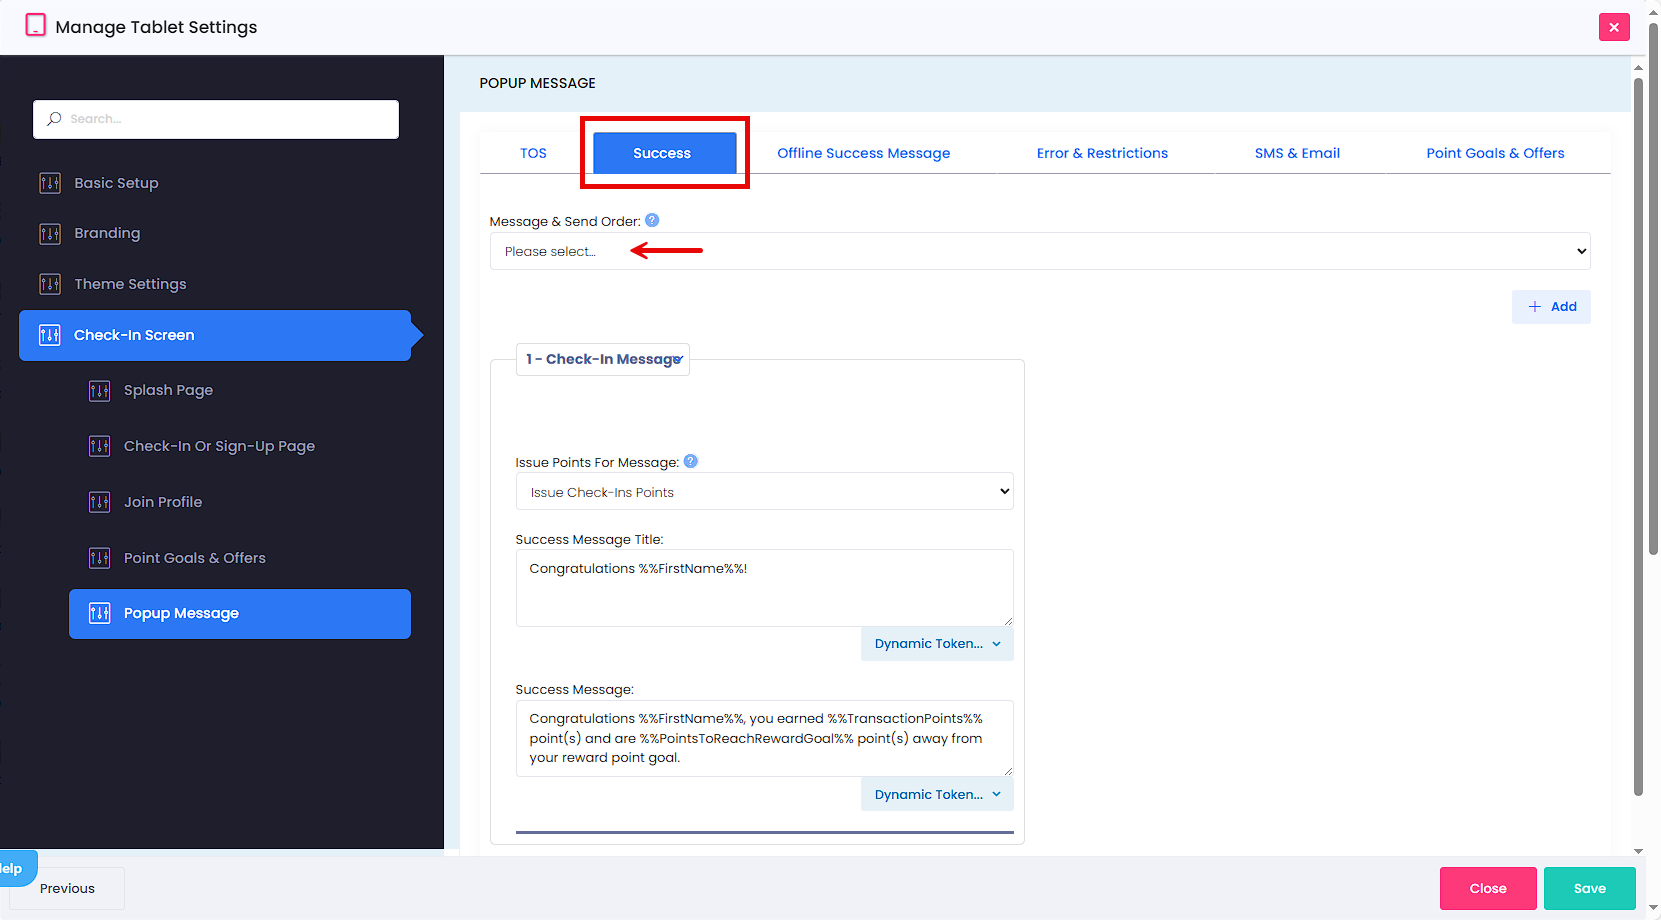
NOTE:
- Randomly - Sends messages in a random order each check-in. Typically used for random check-in rewards, but consider using Gamification as there is more control.
- Loop - Follows the check-in message created workflow. After the first message, the second message will send no matter what the wait time.
- Progressive Points - Similar to the Loop workflow, but after 2x the wait time, the message count starts back at One. For instance, if the wait time is 60 minutes & a player checks-in, after 120 minutes of wait time without a check-in, message one will send the next time the player checks in. Typically used to build up points issued on each check-in to keep players playing.
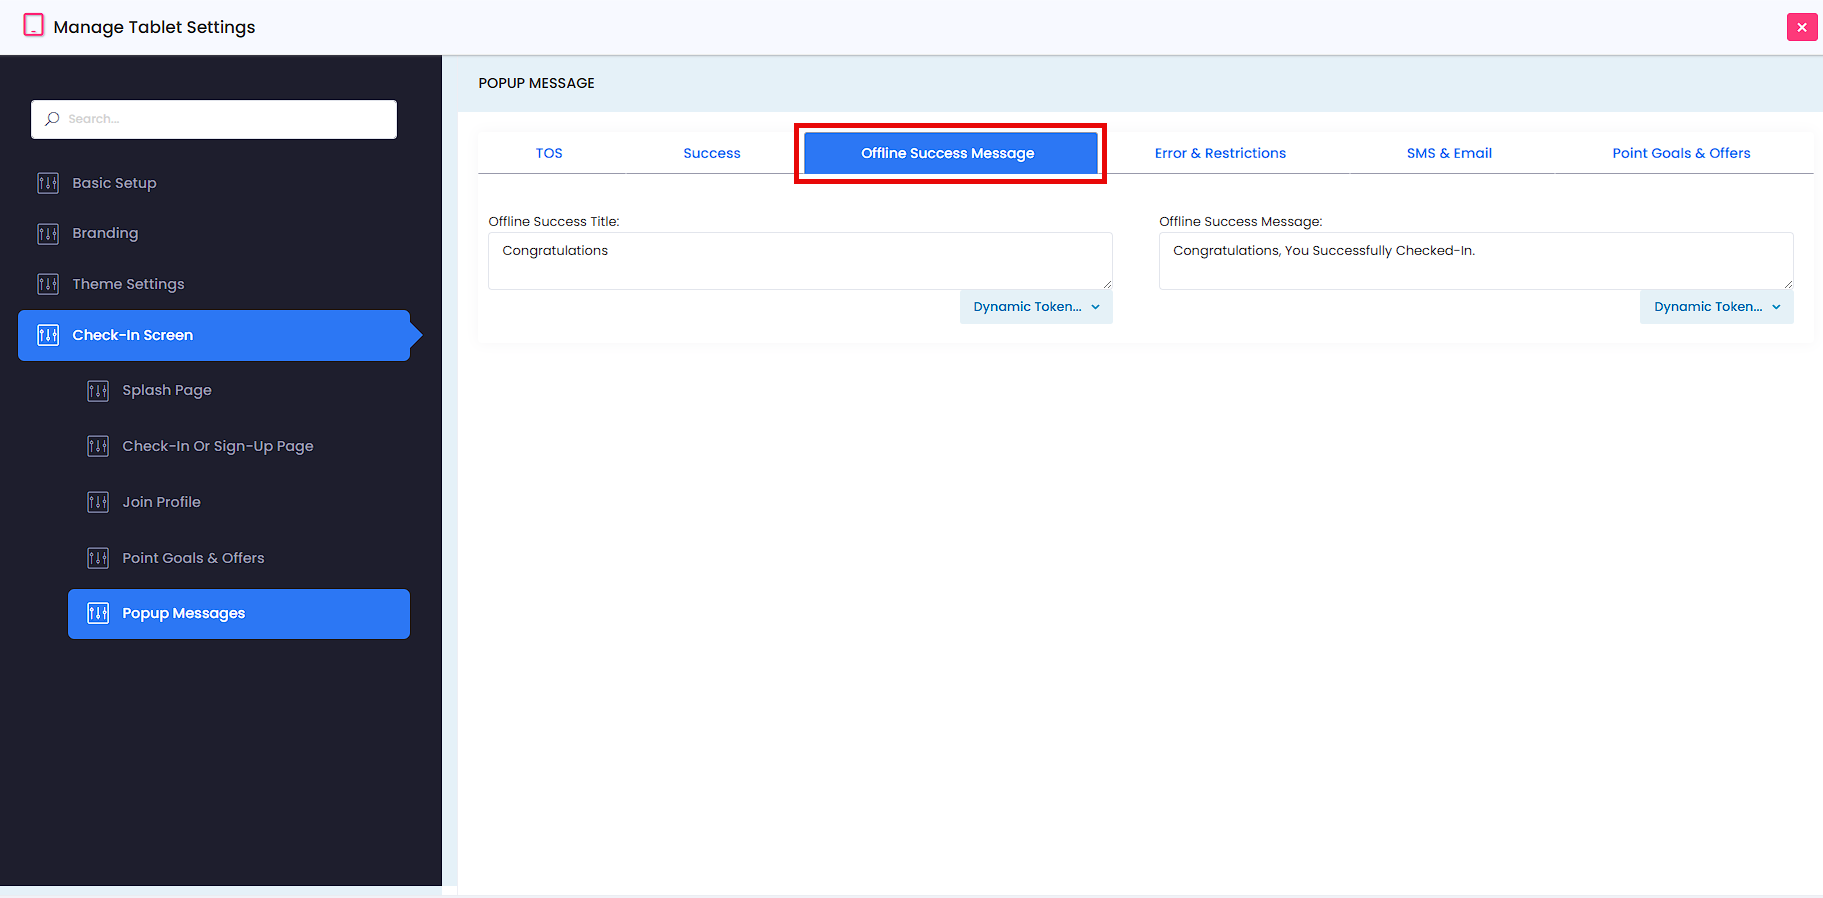
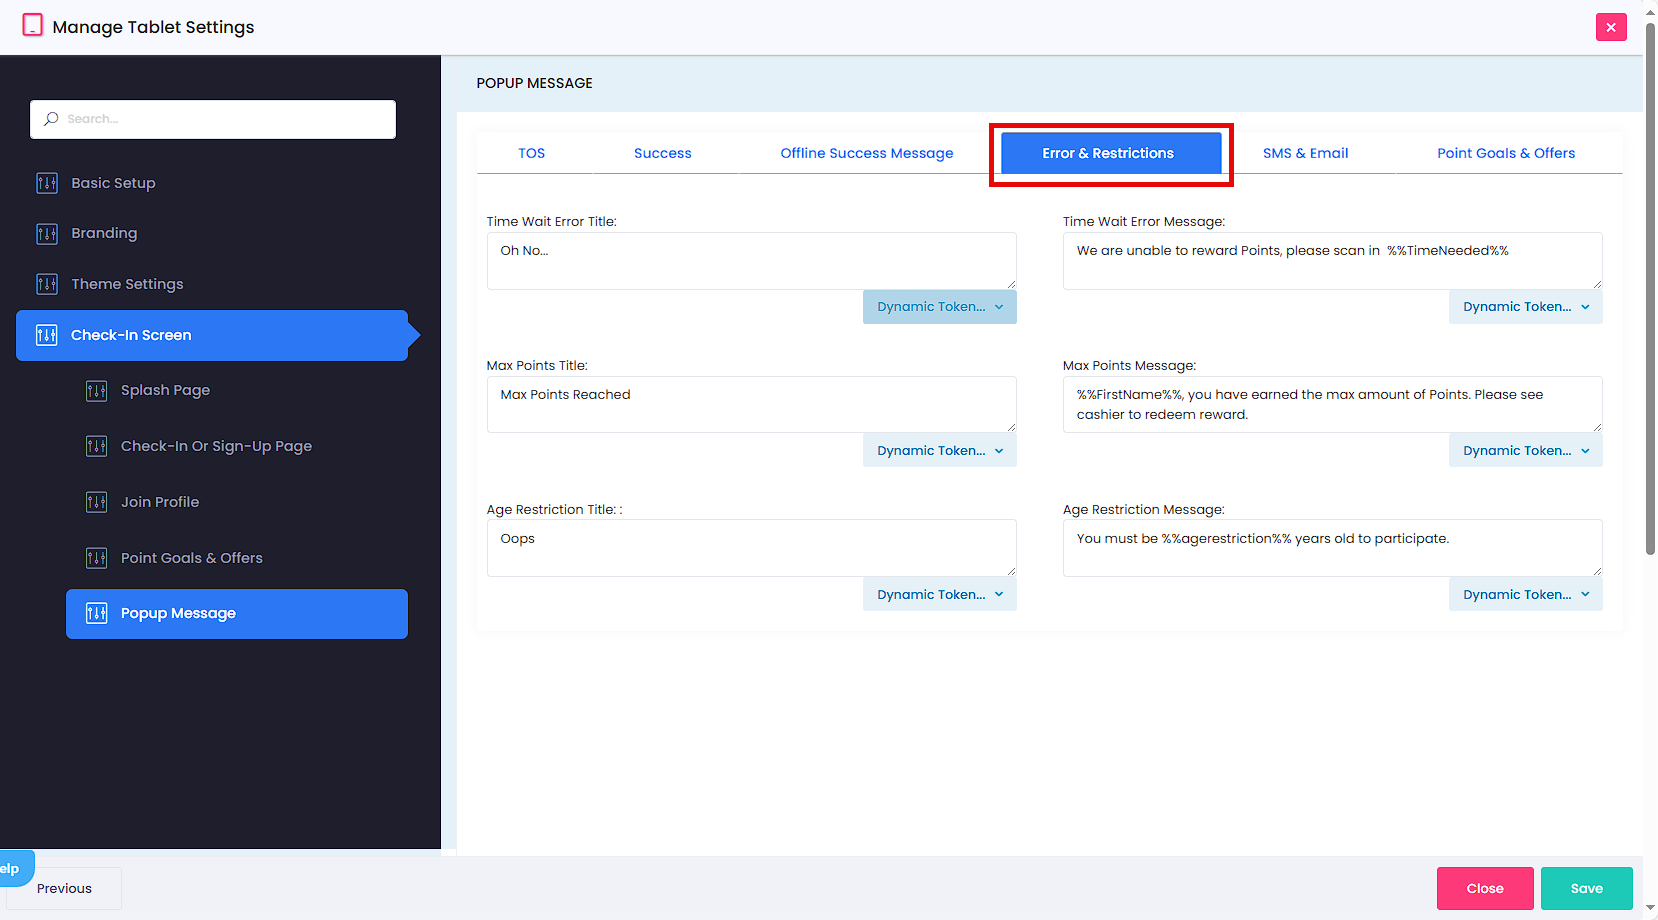
Next to the Success tab is the Offline Success Message and Error & Restrictions. Here, you have the option to customize the message that members will receive on the tablet for success messages or errors when checking in.
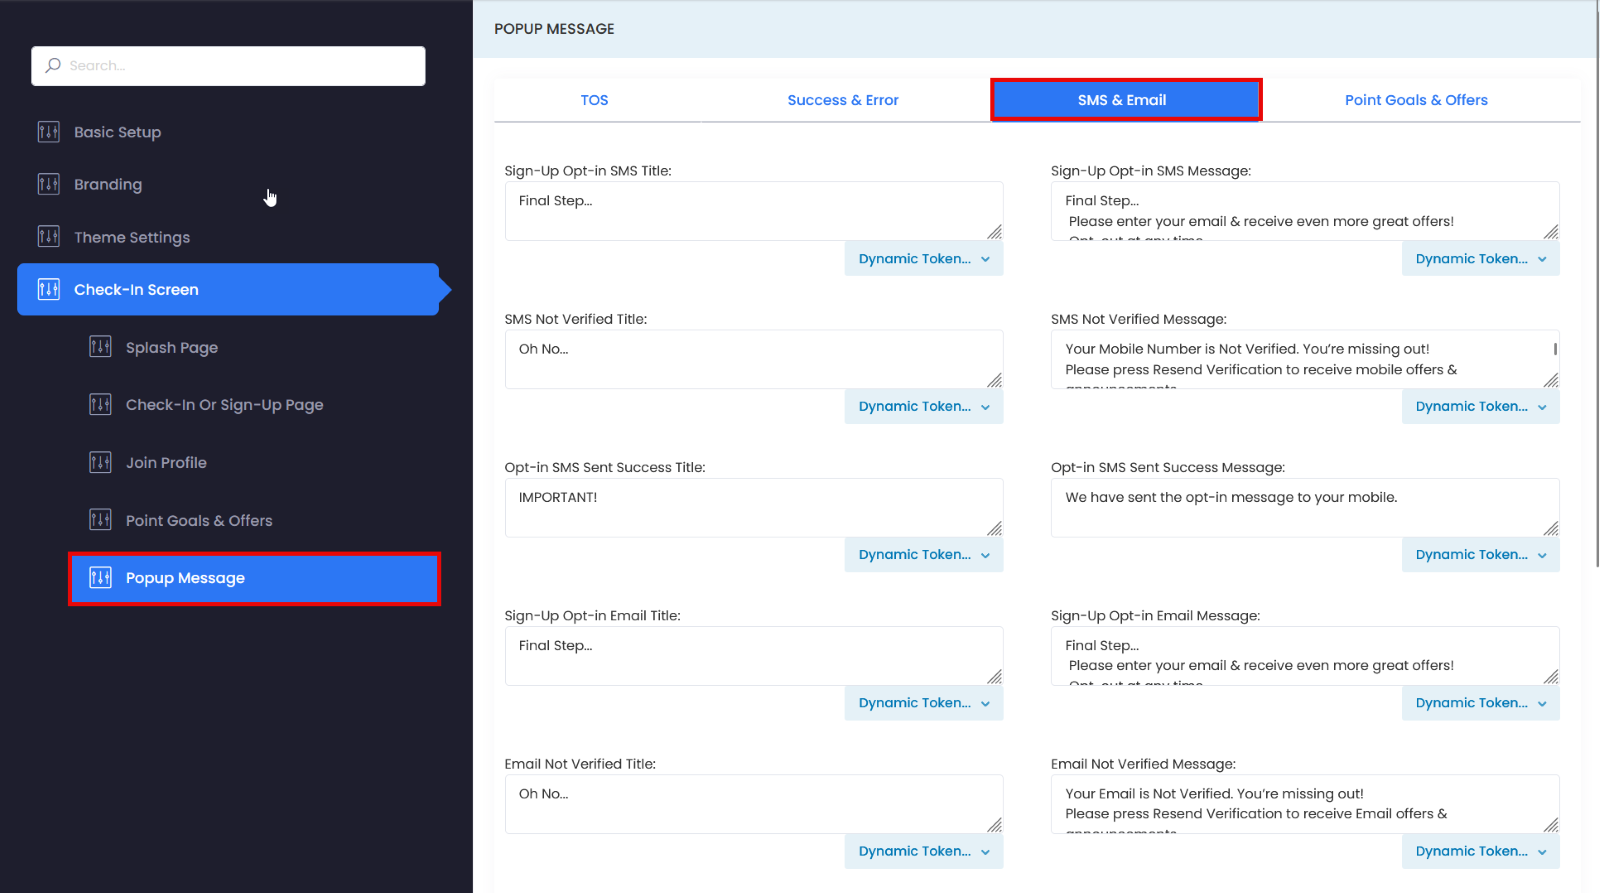
The SMS & Email subtab contains the pop-up messages displayed when a member performs SMS and Email actions on the tablet.
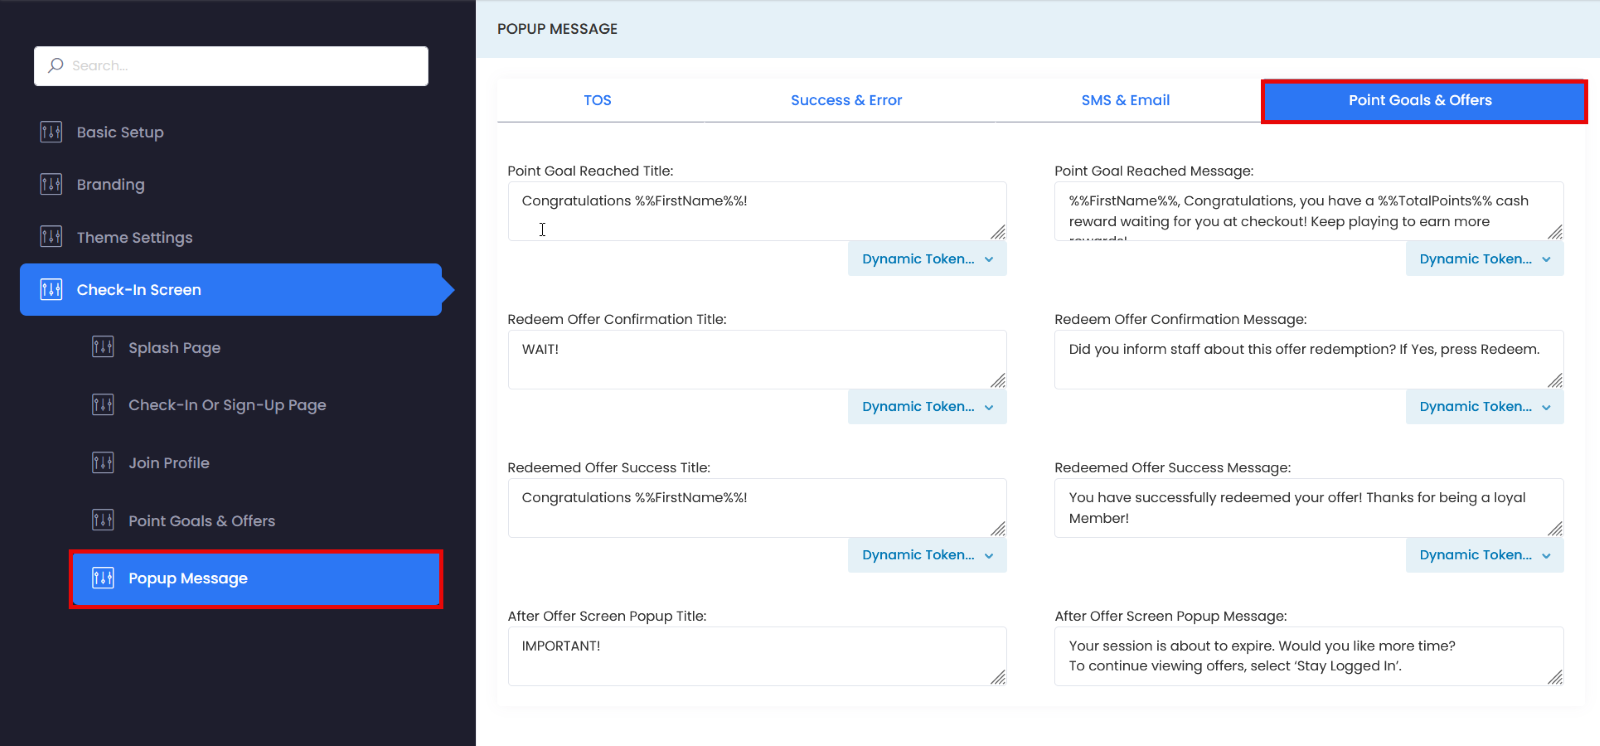
The Point Goals & Offers subtab contains the pop-up messages displayed when a member redeems an offer or reward goal. Once you've adapted all of these to your preferences, hit save.
App Offline Upload Transaction
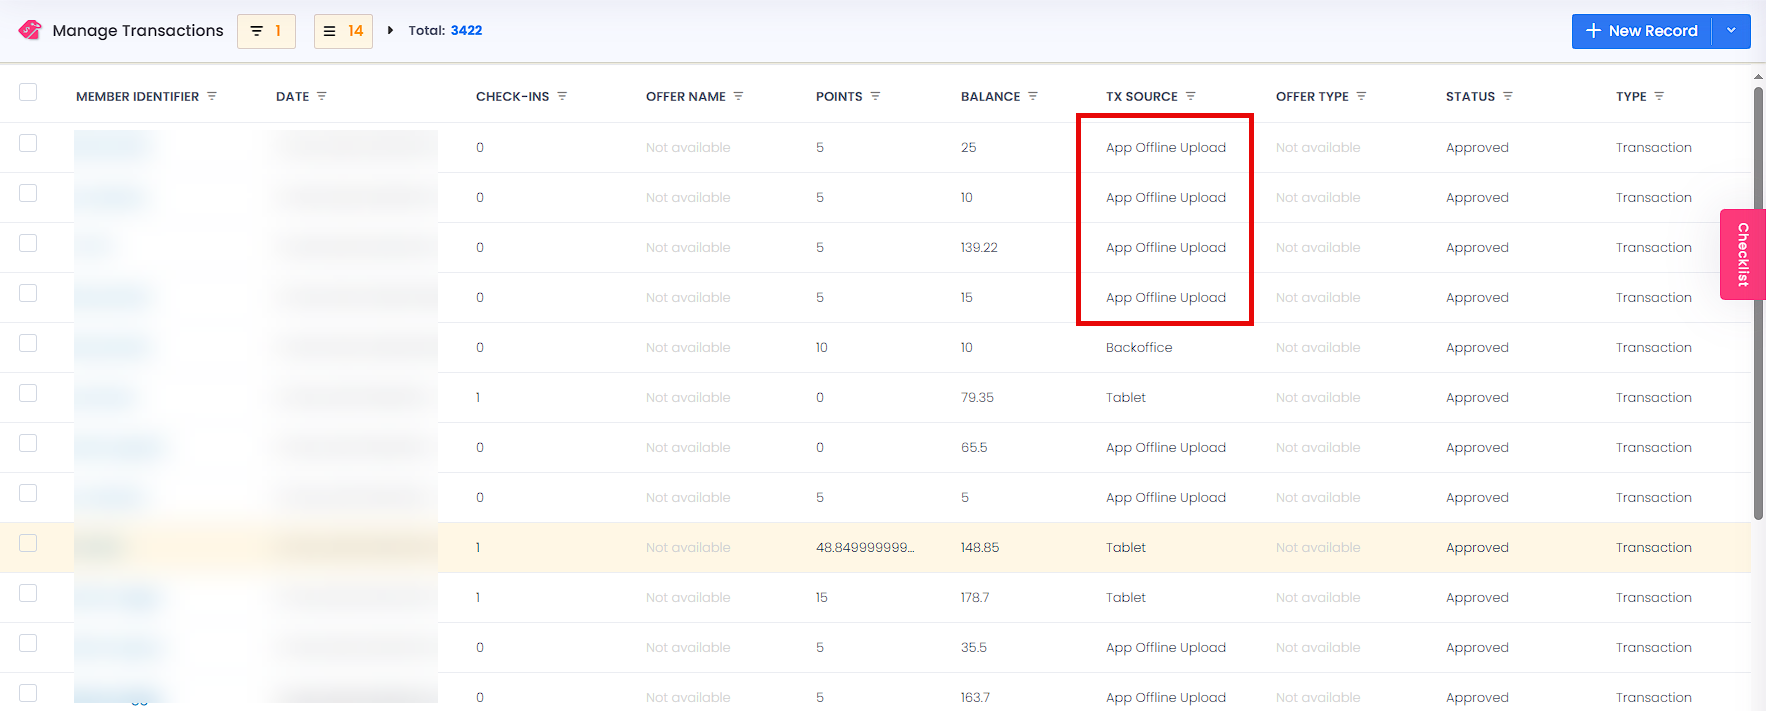
When the tablet goes offline due to an internet connection issue, it will still check in members and record an "App Offline Upload Transaction" on the manage transactions page. Members will still earn points, and these transactions will adhere to the check-in settings established in your program.
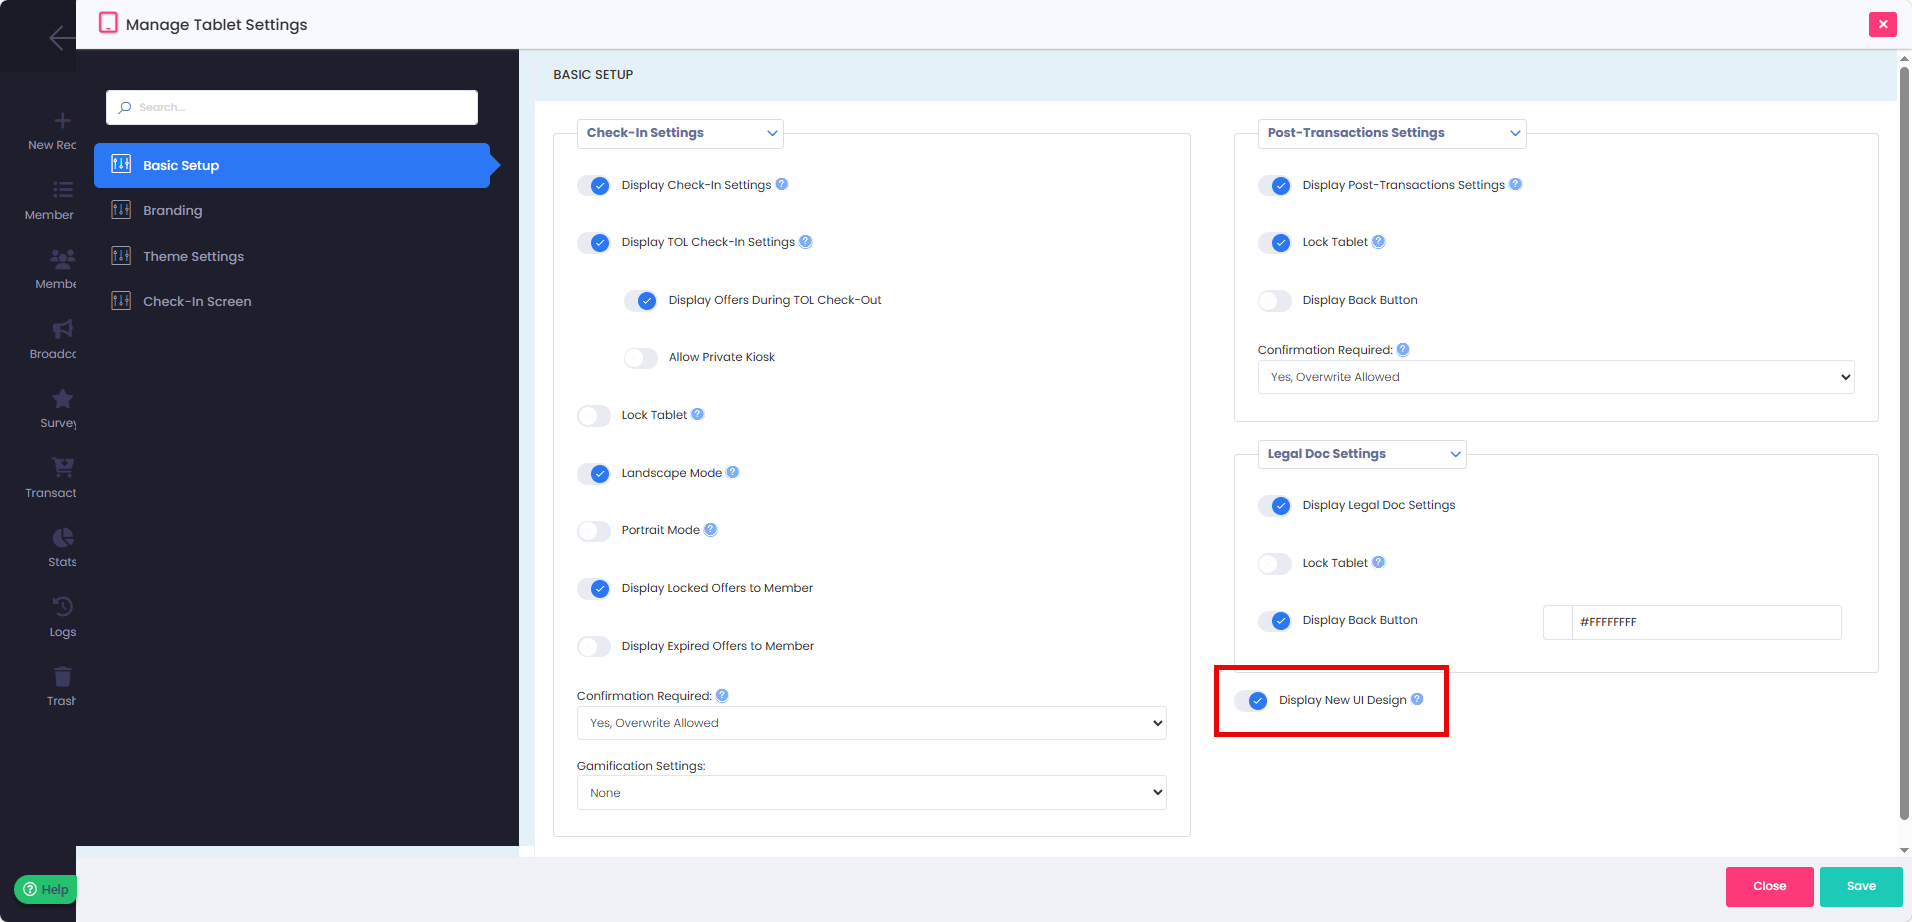
Display New UI Design
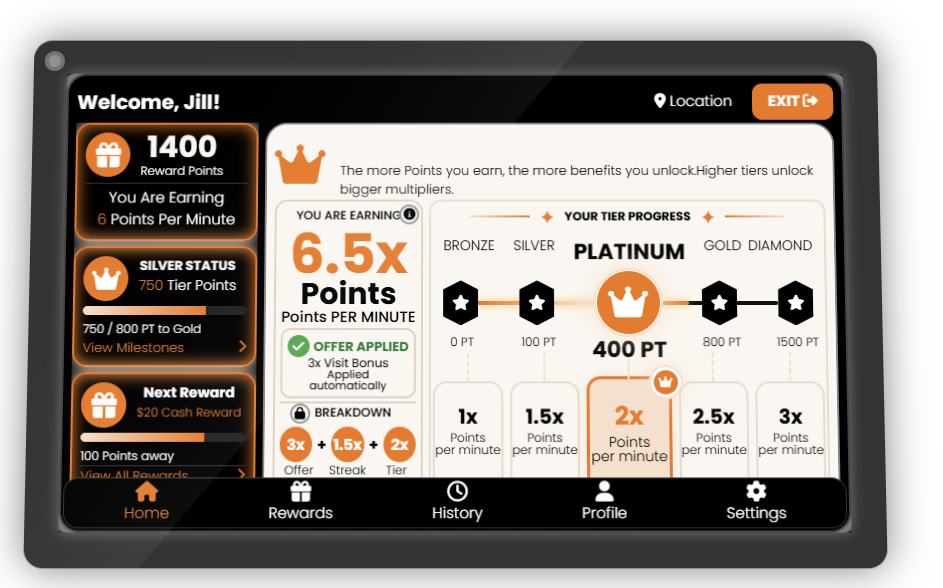
The Display New UI Design provides an updated and more informative experience, making it easier for members to view their loyalty information and access important account features.
With the new design, members can quickly view their current tier and the points they are earning. The updated interface also provides convenient access to:
Available Offers – View offers that are currently available to the member.
Transaction & Points History – Review previous transactions and points earned.
Profile Information – View and update personal information directly from the member profile.
The New UI brings loyalty information, available offers, transaction history, and profile management together in a more convenient and easy-to-navigate experience.
New UI Design Options
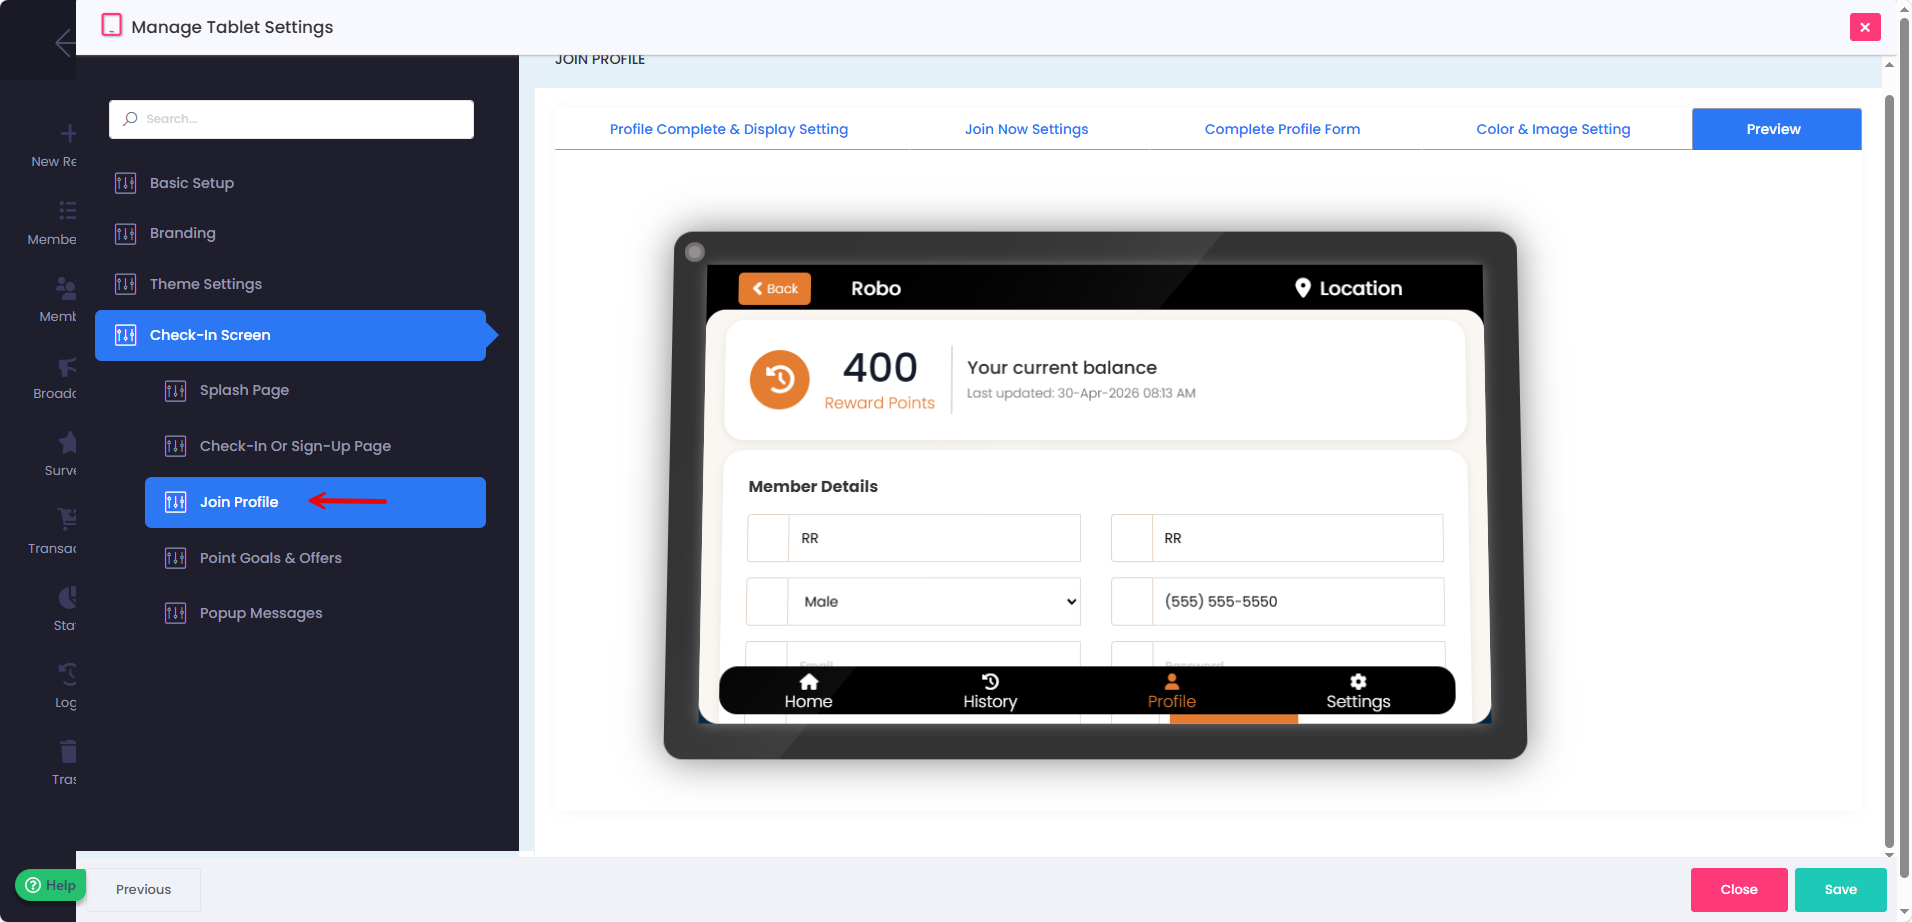
Enabling the New UI Design introduces an updated look and additional configuration options for the Join Profile and Point Goals & Offers pages.
The Join Profile page features an updated design that aligns with the New UI experience, providing members with a cleaner and more consistent interface when viewing or updating their profile information.
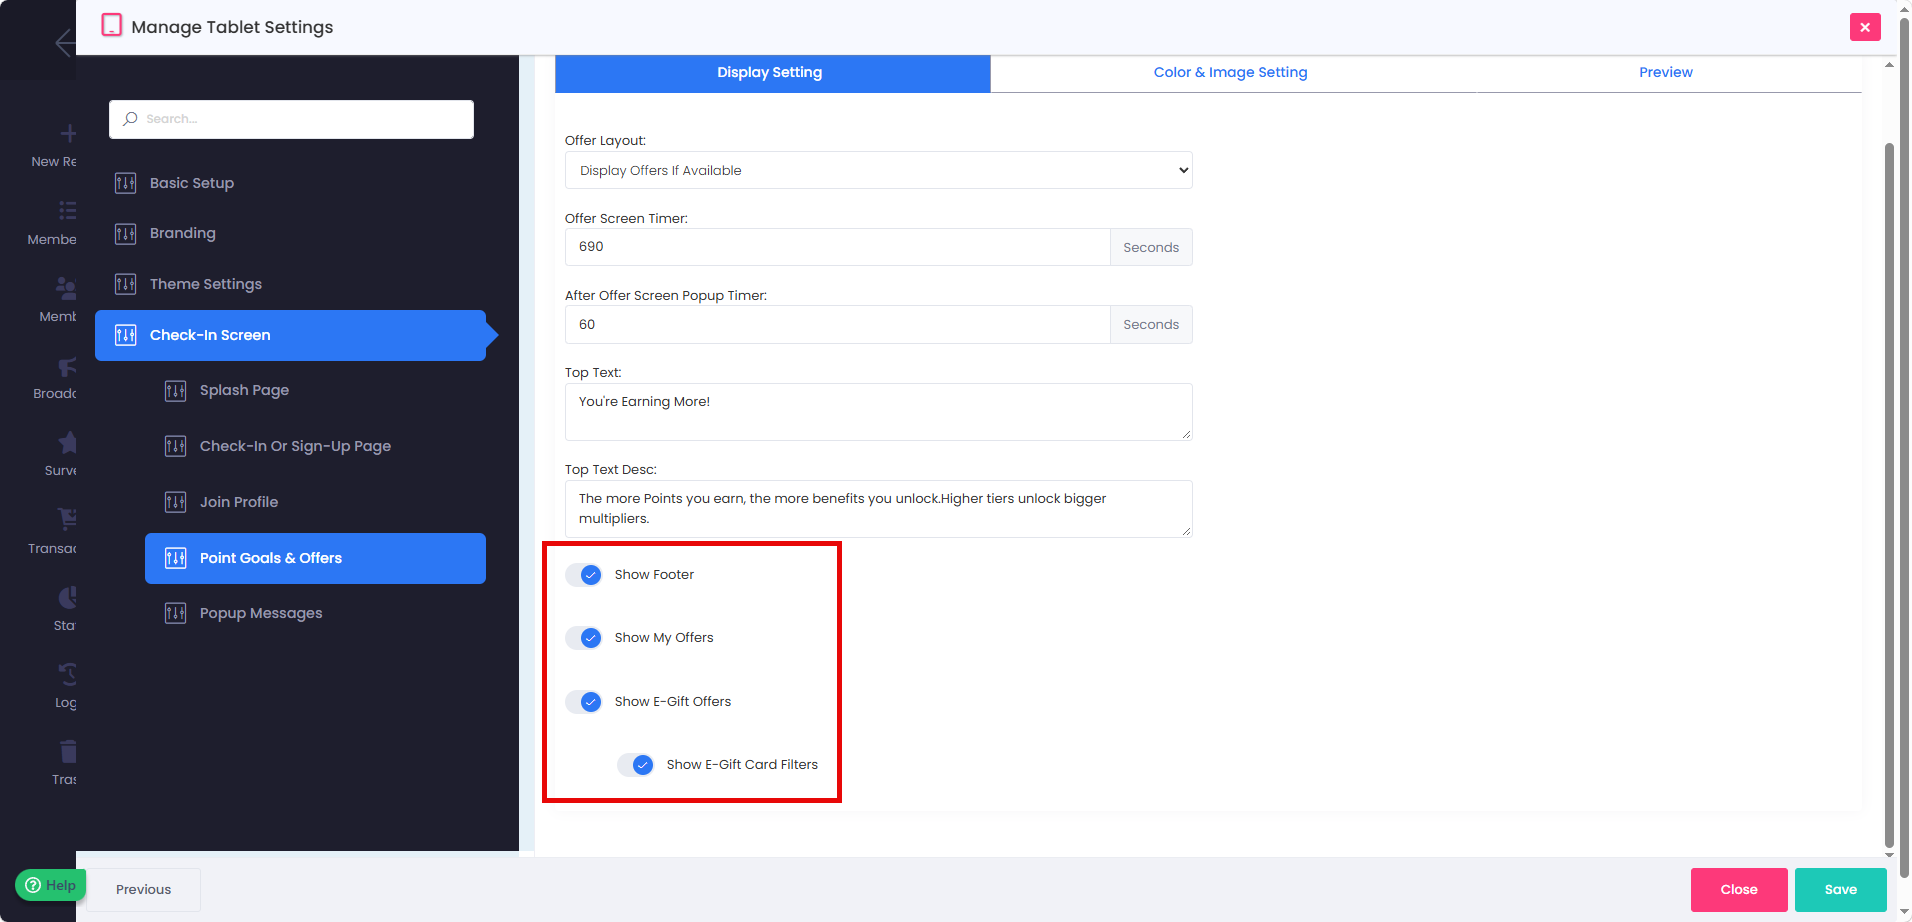
The Point Goals & Offers page includes an option to configure a footer menu. This footer provides members with quick access to key areas of their account, including:
Available Offers
Transaction & Points History
Profile Information
This makes it easier for members to navigate between important account features directly from the tablet interface.
Color Mapping
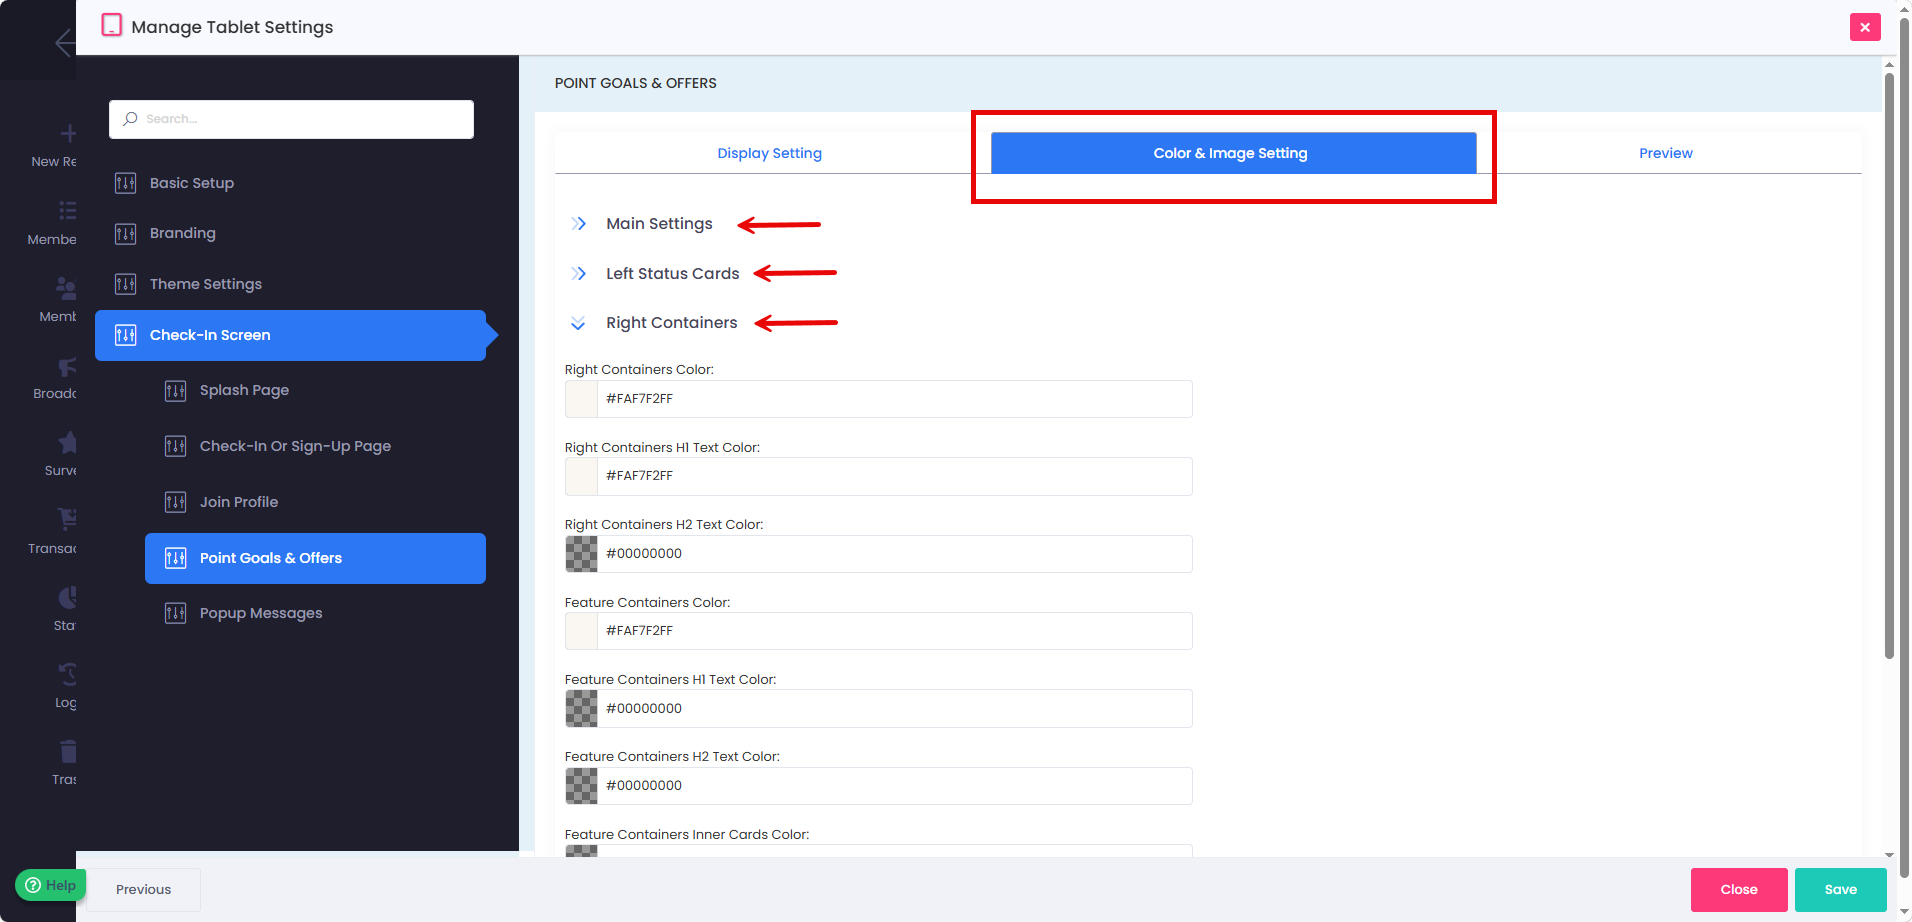
The New UI Design also provides Color Mapping options that allow you to customize the appearance of the tablet interface.
Using Color Mapping, you can configure the colors displayed throughout the New UI to better match your program's branding and visual theme. This creates a more personalized and consistent experience for your members.
If you have any questions, please create a ticket, and one of our support reps will contact you shortly. Thank you.